Part – 02
Reading Time | ~7min
In my previous post, I had explained the basics of Git—cloning a repo, making changes and committing them. However, I left out an important feature of Git which makes a lot of difference while working—branching. For people who are new to version control systems, understanding the commands involved is confusing, if not esoteric.
Before continuing, here are some terms which you must be familiar with.
Branch
- A branch is a line of development which can be continued independently of the main
  line of development. The main line of development is usually called the main branch.
  A line of development means work done to implement a new feature, fix a bug etc.
  In large projects, multiple branches are created, merged and deleted often within
  short periods of time.
Pushing
 - When a commit is made, all changes reside locally on your computer. For these commits
   to be visible to others, we need to ask Git to perform a push operation.
Building a Space Elevator
In my previous post, I had used the example of a space elevator to explain the basics of Git. Continuing in the same spirit, we’ll make some changes to the scenario. Assume that you are the manager of the construction crew making the elevator. Your role is to schedule tasks to be performed by workers. However, unlike the example in my last post, you have about two thousand workers. These workers do the job of maintaining the space elevator, performing safety checks during installation of equipment and many related tasks. Your team consists of three co-workers—Aiko, Rahul and Anne—who also create schedules. Your team needs to update the schedules in a common repository. This repo can be accessed by your team and is visible to the workers.
Schedules are highly dynamic in nature. A worker is rarely assigned the same task each day. To manage the large number of workers, your team may decide to split the duties based on worker-IDs, for example workers with IDs 1 to 500 managed by Aiko, 501 to 1000 managed by Rahul and so on. However, to concurrently update these lists, each of you must have a copy, and the workers must always have a consistent schedule for a day. Some workers may also need to work alongside others for complicated tasks, and the movement of workers and construction equipment must take place without causing deadlocks.
If your team decides to update the repo in a sequential manner, team members may end up modifying each other’s work, thus causing confusion among workers. This problem can be avoided by keeping conflicting changes separate from the main line of work.Here, Git can save you time. Git allows you to do this by creating a new branch.
In this case, we have aptly named it conflict-checking.
Using Git, your team can create deadlock-free schedules by committing changes to the main repo as you resolve conflicts in the conflict-checking branch. Conflicts can be resolved in multiple ways:
- Discussing with your team to create schedules. As changes are proposed, they can be committed to the
conflict-checking branch. After fully resolving deadlocks, the conflict-checking branch can be merged into the main branch. - Each team member can work on a branch. Conflicts are resolved during the merging process.
For simplicity, we’ll use the first approach.
Using multiple branches
Large teams often use multiple branches to increase their throughput. A common issue with having a large number of branches is merge conflicts. These occur when two or more branches modify the same file in contradicting ways. When such branches need to be merged into the main branch, Git asks the person doing the merge about the version of the file to keep. To help resolve such conflicts, Git marks the conflicting regions in the files in a special way. An example is given below.

The lines above ‘=======’ represent the change made to the file in the current branch, while the lines below it show the changes made to the file in the branch being merged. To resolve these conflicts, developers usually choose a more correct version of the changes, or decide to keep the best parts of both changes. After resolving conflicts, the lines containing ‘>’ and ‘<‘ are removed and so is the line of ‘=’ symbols. The final result looks like this:

Let’s Branch
Here is the task your team needs to perform:
- Clone the repository containing the schedules.
- Create a new branch named conflict-checking
- Create non-conflicting schedules after discussion.
- Commit changes.
- Checkout the main branch
- Merge changes from the conflict-checking branch into main.
For any of the above steps to work, you must have Git installed and a copy of my repository of the (imaginary) space elevator.
In case you want to contribute to the repository, fork the repository and then clone it. This will allow you to create a pull request on GitHub. You will need a GitHub account to perform a pull request.
Cloning the Repo
Type
git clone https://github.com/Rapteon/lets-git-it.git
into a new GitBash/CMD/Powershell/Terminal window after you have navigated to the directory of your choice.

Creating a new branch
To create a new branch, type git branch <branch_name> where <branch_name> is the name of the branch. If you want to create a branch named conflict-checking, type:
git branch conflict-checking
Although Git creates a new branch, it does not switch to the new branch. In the space elevator example, at this stage, if you do not switch to the new branch, any changes in schedules will be directly reflected to workers, even if the schedules are conflicting. This happens because you are currently on the master/main branch. To prevent this and to safely work on the schedules, you need to switch to the new branch. This process is called checking out a branch. To check out a branch, type:
git checkout <branch_name>
In this case, the <branch_name> is conflict-checking, so the command becomes
git checkout conflict-checking
What exactly is a Branch?
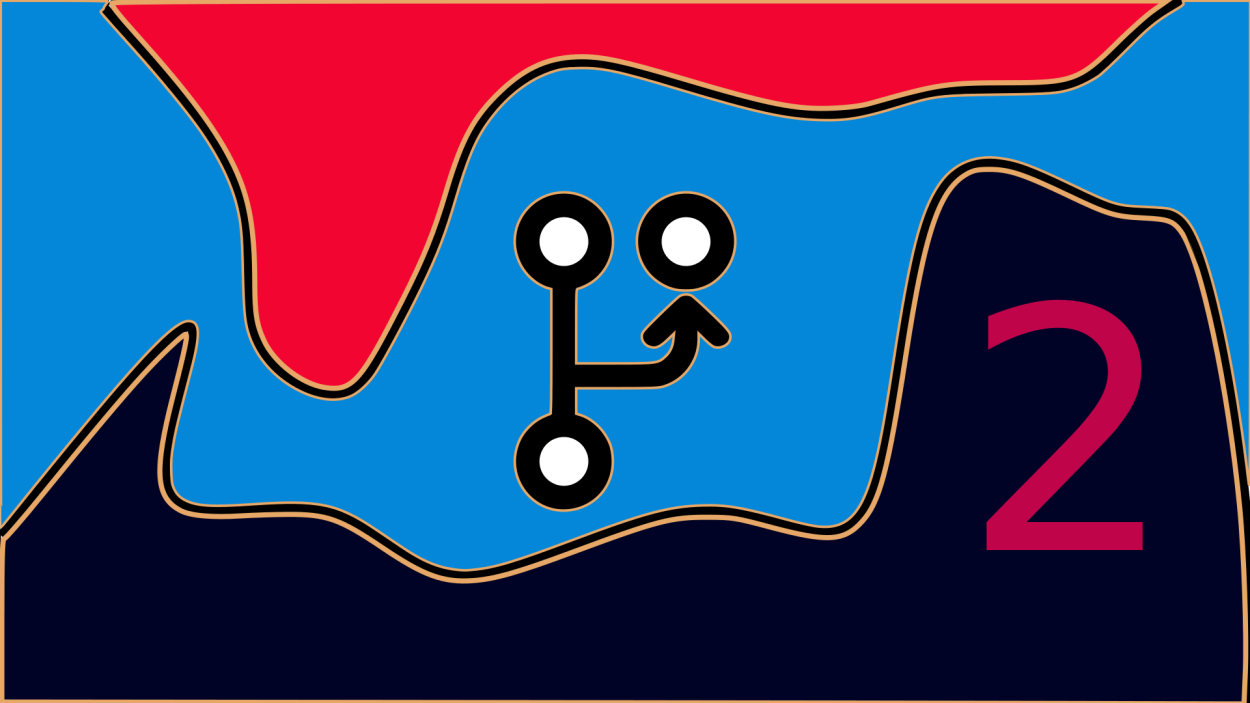
A branch is just a pointer to a commit. This is the reason why branching is so fast in Git. Creating a new branch simply involves creating a new pointer. This pointer has the property of always pointing to the last commit performed.
But how does Git keep track of various branches? For this, it uses a special pointer named HEAD. For most people, HEAD points to the default branch, usually named main or master. If you only have a single branch in Git, then the branch pointer keeps pointing to the latest commit.
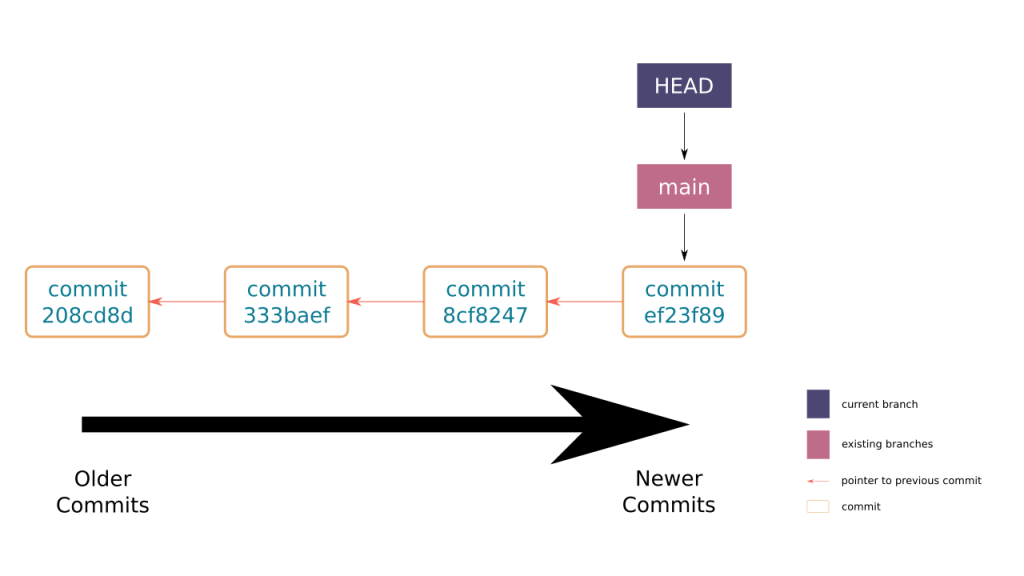
As can be seen in the above diagram, a branch is a pointer to a commit, and Git determines which branch its currently using by the HEAD pointer. If you have multiple branches, the commit history may look like the following.
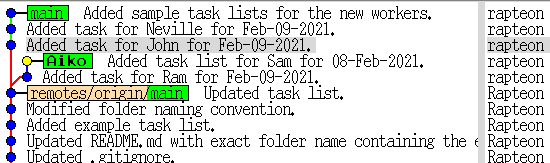
In the above image, you can see the divergence in the history of the project due to committing work in two different branches. The main branch has newer commits when compared to the Aiko branch. When Git checks out a branch, it replaces the files in the repository with files snapshotted in the last commit to which the checked-out branch points. When a branch is checked out, the HEAD pointer switches to the branch which was checked out. The following image shows how checking out conflict-checking causes the HEAD pointer to switch.

Creating a schedule + Committing
You can create a new schedule by first creating a new folder and copying an existing schedule, say Jan-31-21.md from the rapteon folder into it. Edit the copied file and commit the changes.
Try checking out the main branch by typing:
git checkout main
After doing so, you’ll notice that the changes which you made are not visible. This is because changes made in the conflict-checking branch have not been merged yet.
To merge these changes into main, try:
git merge conflict-checking
If there are no conflicts, then Git will successfully merge the changes. There are multiple strategies which can be used to merge two or more branches. You can refer to some of the types here.
If Git reports that it cannot merge the branches, then you may need to manually sort out the changes being introduced into main. This can involve editing multiple files. Refer to the instructions here.
Enfin
Branching is really useful, if you know how to do it well. In a team, it aids members to parallely work on different, albeit related things. Hopefully, this post helped you understand the basics of branching.